Unity plugin
Unity Plugin Integration
Step 1: Getting Start on Windows 11
1.1 Install CUDA
Version v12.8
1.2 Install GStreamer library
Download the GStreamer library(gstreamer-1.0-msvc-x86_64-1.22.12.msi and gstreamer-1.0-devel-msvc-x86-1.22.12.msi).
Suggest to use GStreamer v1.22.12
Note:
It's better to install the GStreamer to the default path as "C:\gstreamer" or "C:\Program Files\gstreamer"
Do remember to add the "path\to\gstreamer\1.0\msvc_x86_64\bin" to the system environment variables of "Path". Then restart the PC.
1.3 Install Bonjour
Download and install bonjour: Bonjour print services
1.4 Download the Flowbit server Unity plugin
Download plugin tar(determ_flowbit_server_unity_plugin_win_11_x64_v1.4.0.tar).
Step 2: Import Flowbit Unity Windows Plugin
2.1 Create the Unity project
For Unity 6000.0.37f1
Create a Universal 3D project
For other Unity versions (e.g. 2022)
Option 1: Create Universal 3D project
Open Package Manager (Window > Package Manager)
Switch to Unity Registry
Search and Install: Input system
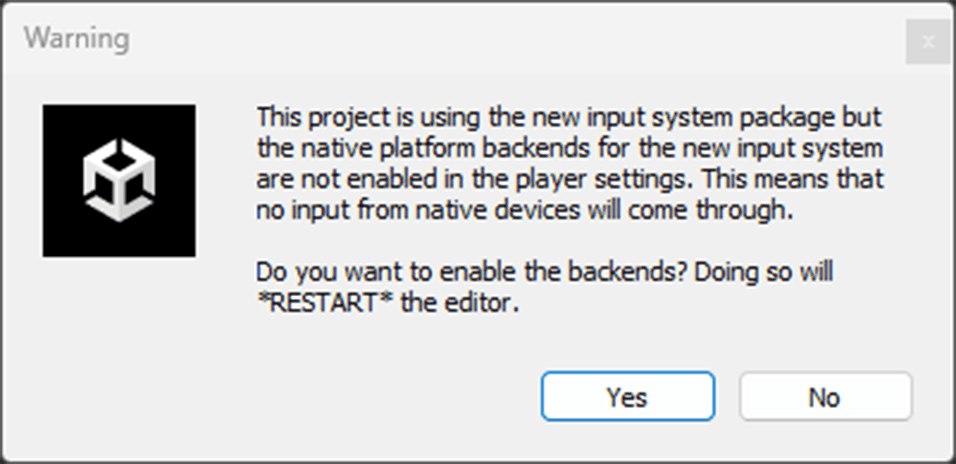
After the Input System is installed, a window will appear. Press “YES” to restart Unity.
Option 2: Create 3D (Built-In Render Pipeline) project
Open Package Manager (Window > Package Manager)
Switch to Unity Registry
Search and Install: Input system
After the Input System is installed, a window will appear. Press “YES” to restart Unity.
2.2 Import Flowbit Unity plugin
Press Assets > Import Package > Custom Package, then select the Flowbit Unity plugin from your download path.
For Unity 6000.0.37f1, the TMP importer window will appear. Press “Import TMP Essentials”.
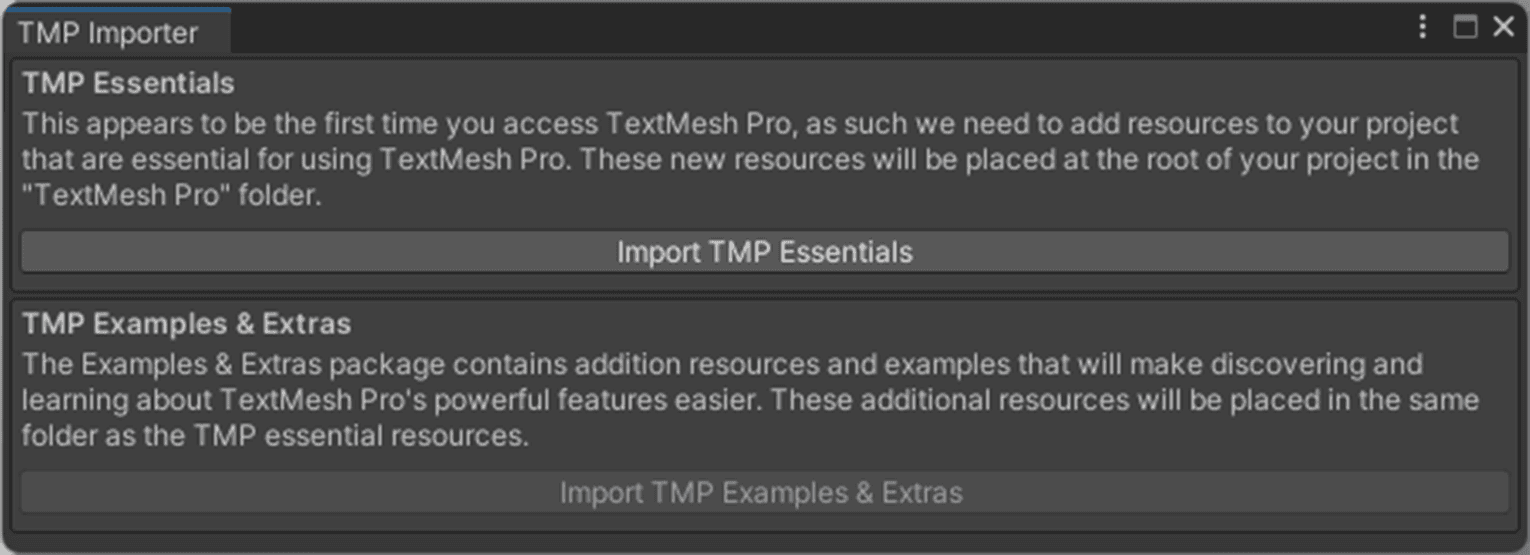
For other Unity versions, the TMP importer window may appear when you open the scene. Please also press “Import TMP Essentials”, then re-open the scene.
2.3 Note
The plugin requires the unsafe code permission to be enabled in the project:
After importing the Asset Package, go to Edit > Project Settings > Player.
In the Other Settings section, check the Allow unsafe code box.
Step 3: Introduction for example scenes
3.1 Direct streaming
Open FlowbitServerStreamingExample in the Scenes folder
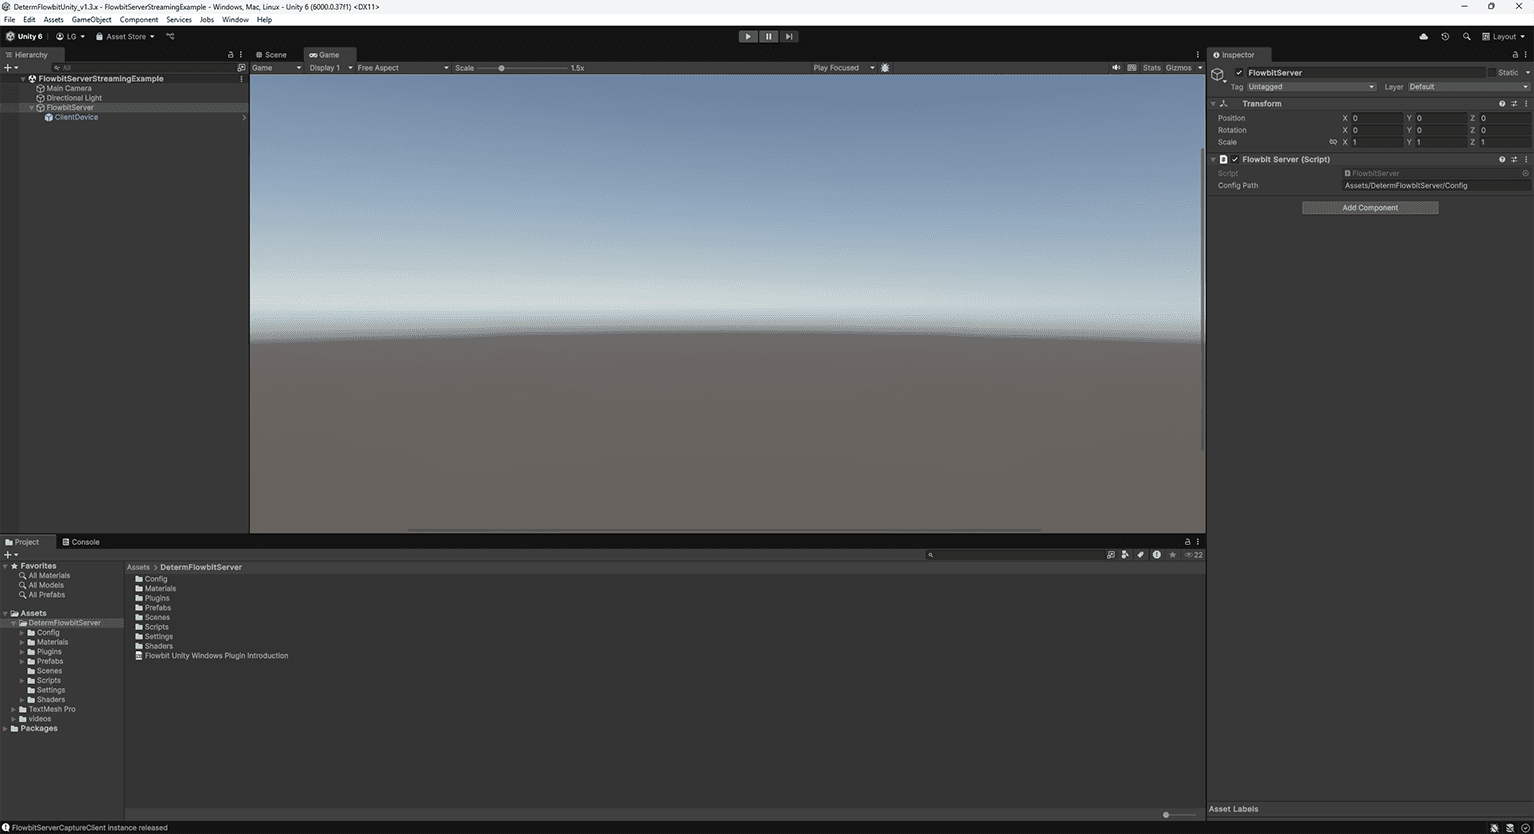
Select the FlowbitServer object in the hierarchy. In the inspector, edit
Config Path. Here we useAssets/DetermFlowbitServer/Config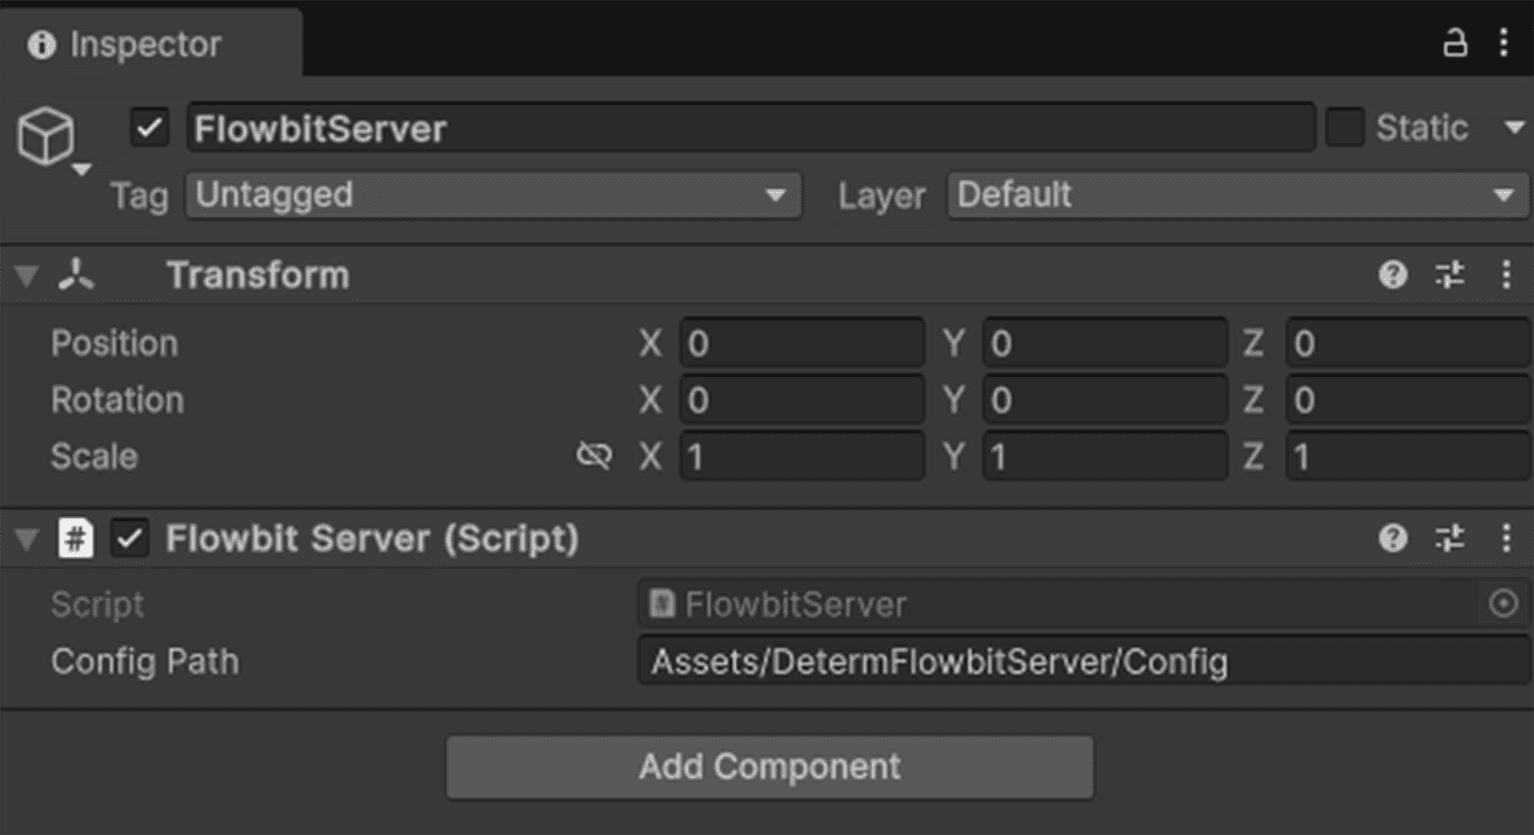
Select the ClientDevice object. In the inspector, modify
Client Device ID. Here we useSZVIDS-250214-923020-3002B0-38D5B8(It should be theDevice IDof the target client). KeepEnable Managerunticked. KeepIs Live Streamingticked. There are two choices ofVertex Material. You can find both of them in theMaterials/PointCloudfolder. The PointCloud_Vertex material renders the points in the point cloud as single points. The PointCloud_RectPlane renders each point in the point cloud as a small rectangle.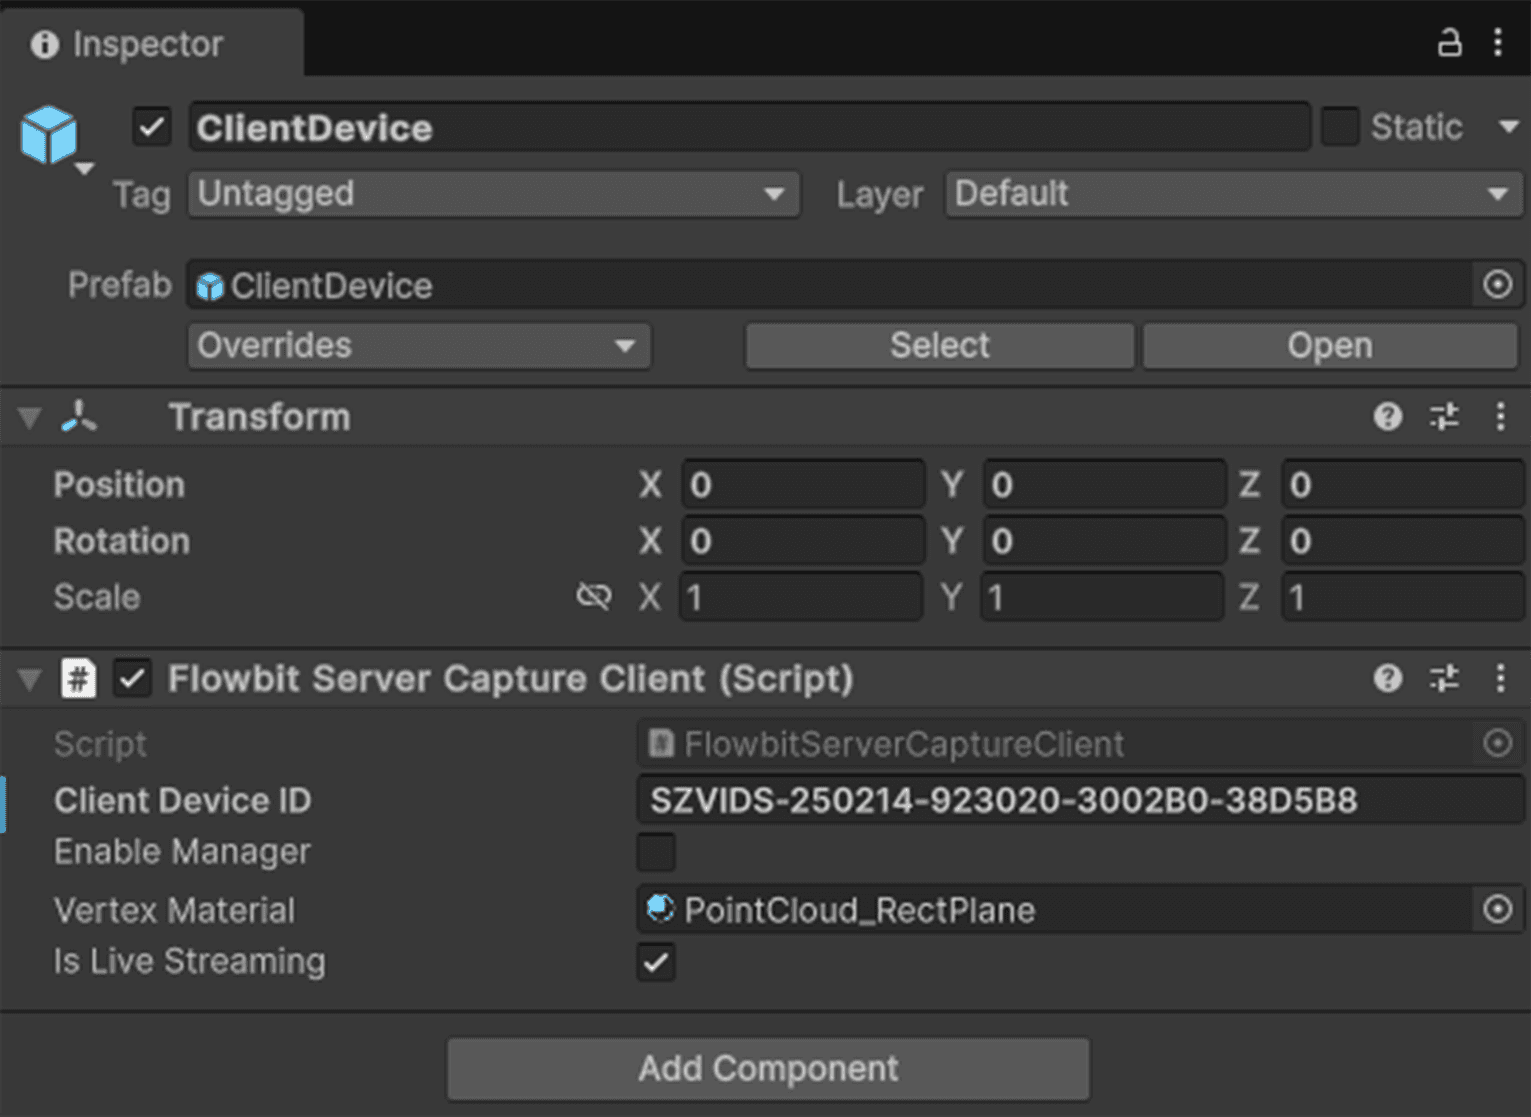
Check the folder
SZVIDS-250214-923020-3002B0-38D5B8inAssets/DetermFlowbitServer/Config. This folder should have the same name as your input in theClient Device IDfield above. Open thecapture_configfile in the folder, and modify the Device IP to the IP address of the client device you intend to connect to..
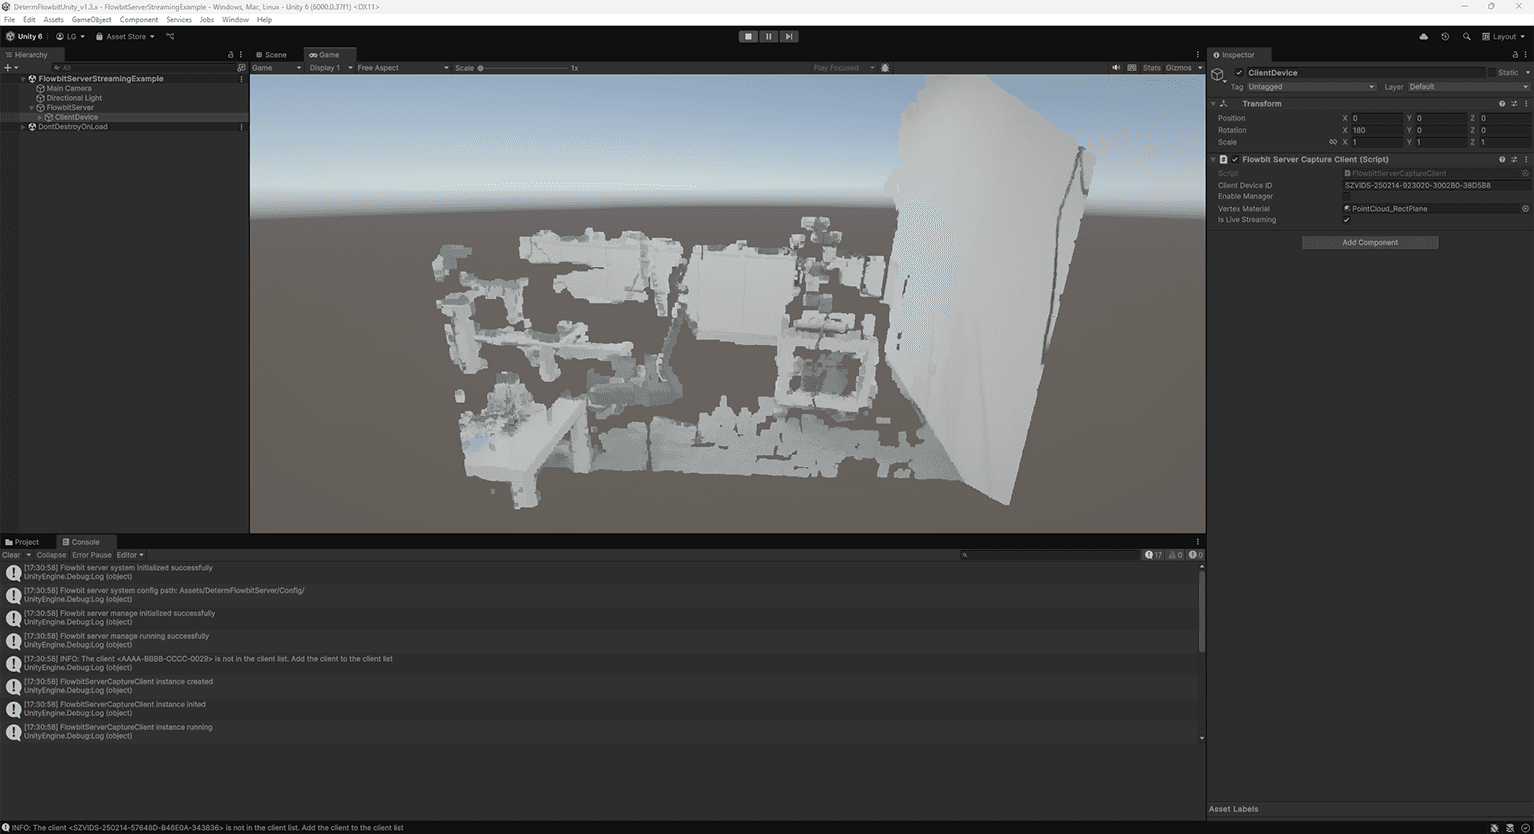
Make sure the client device is working. Then press Play to watch the point cloud in the editor.
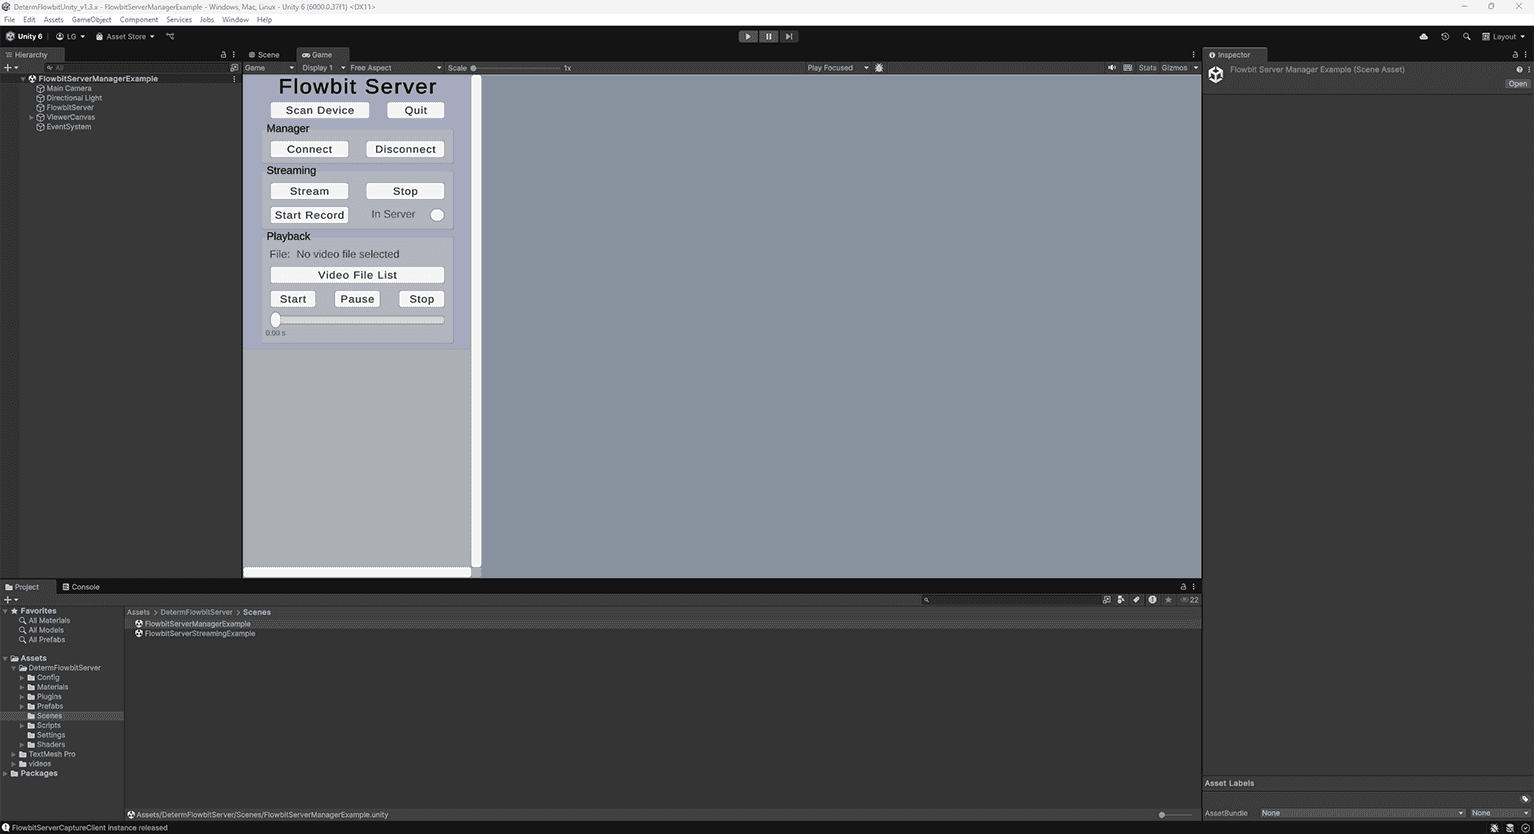
3.2 Fully functional example with manager enabled
Open FlowbitServerManagerExample in the Scenes folder
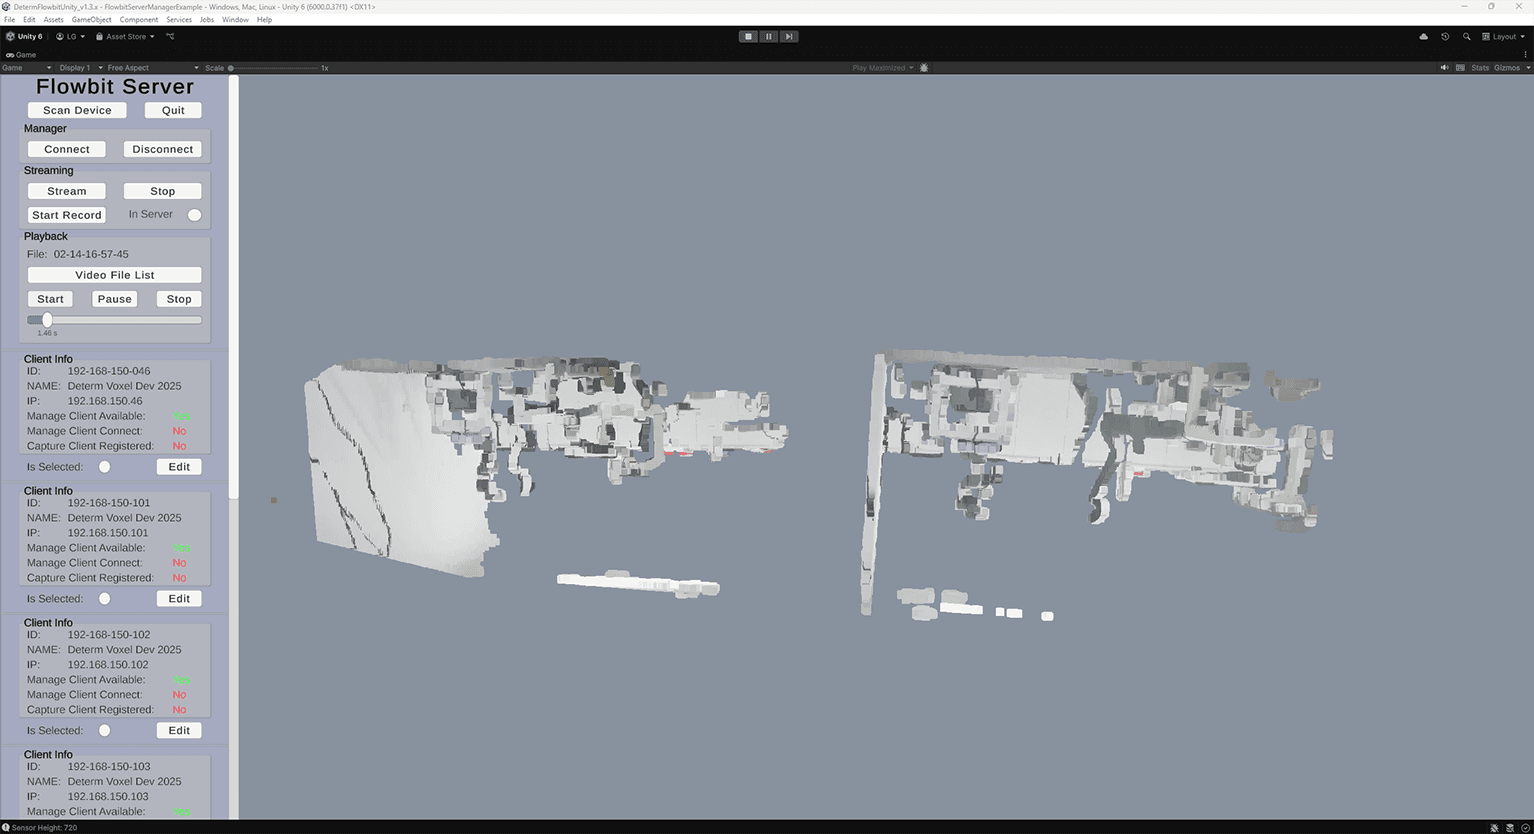
Press Play to run the example
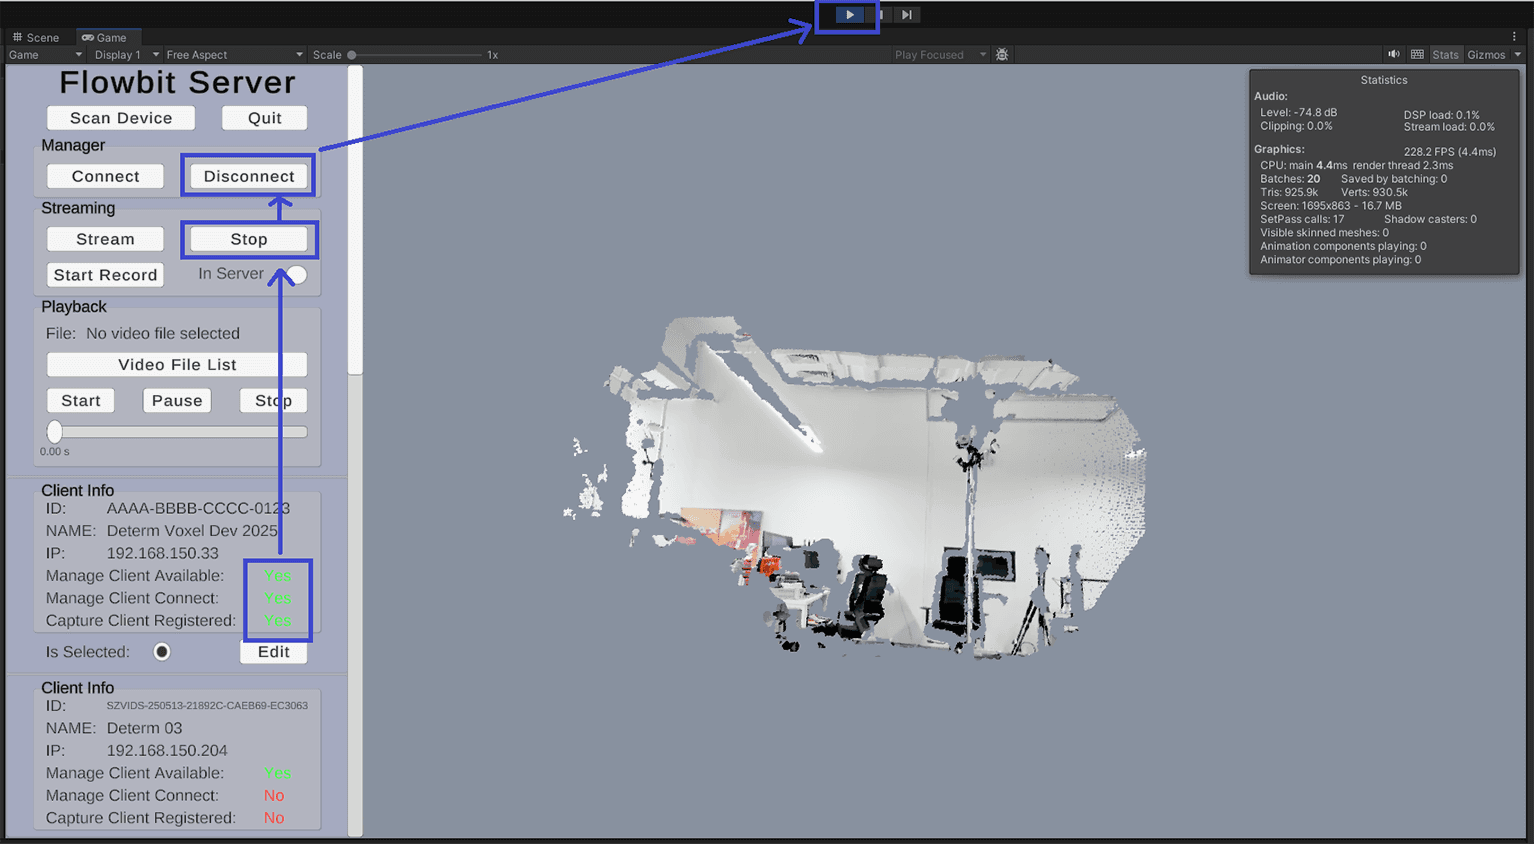
Press Scan Device to find the available devices in the local network. The client info will be listed in the UI as shown below. You will see several clients available in the local network with their information displayed in the Client Info panels..
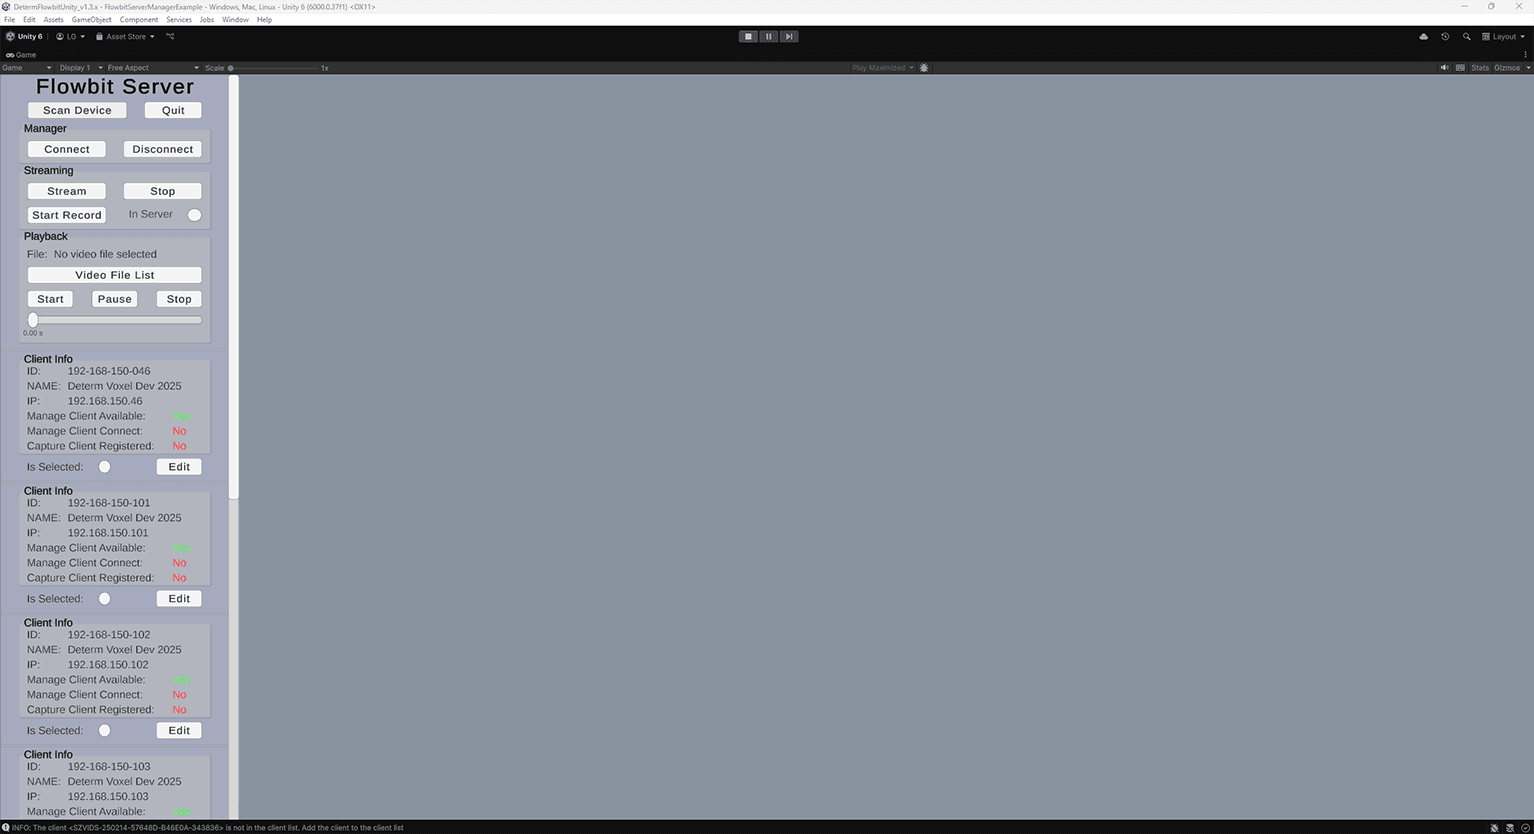
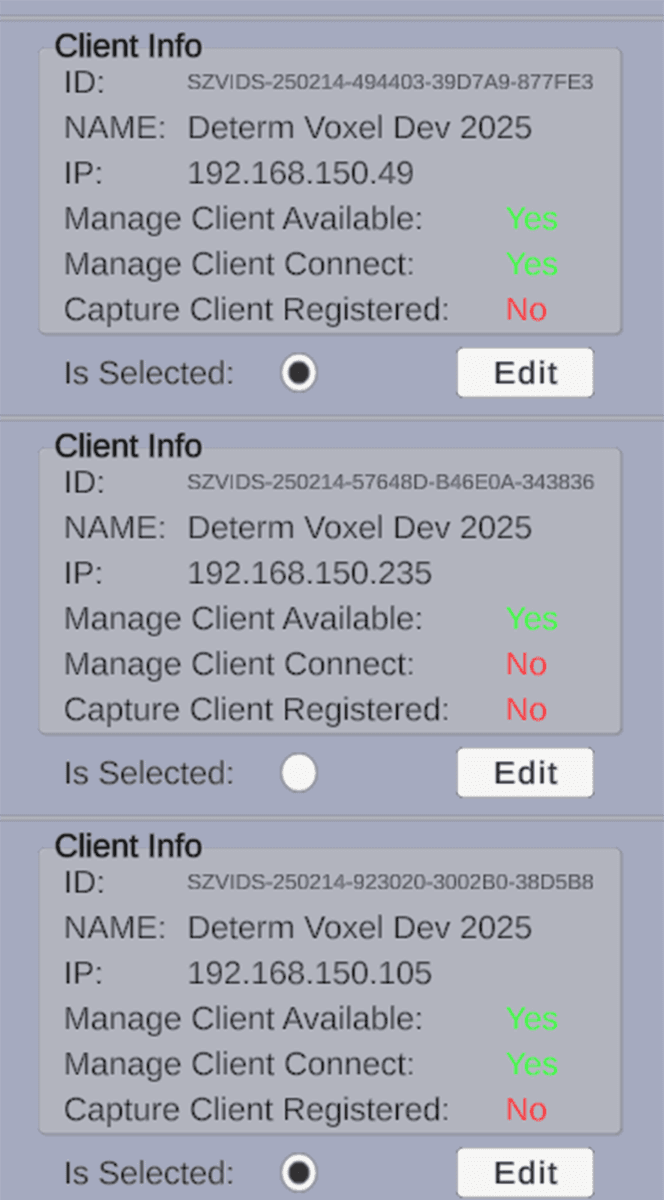
Use the buttons Connect and Disconnect to connect or disconnect the server from the clients (only the clients with the Is Selected toggle on in the Client Info panel will be controlled). If you press the Connect button, the Manage Client Connect message on the Client Info panel will turn to Yes. As you can see, there are two clients with the Is Selected toggle on, so only these two clients will be connected after pressing the Connect button.
Use the buttons Stream and Stop on the Streaming panel to start or stop point cloud streaming after the server connects to the clients. If you press the Stream button, the Capture Client Registered message on the Client Info panel will turn to Yes. Then the point cloud stream will be rendered in the window.
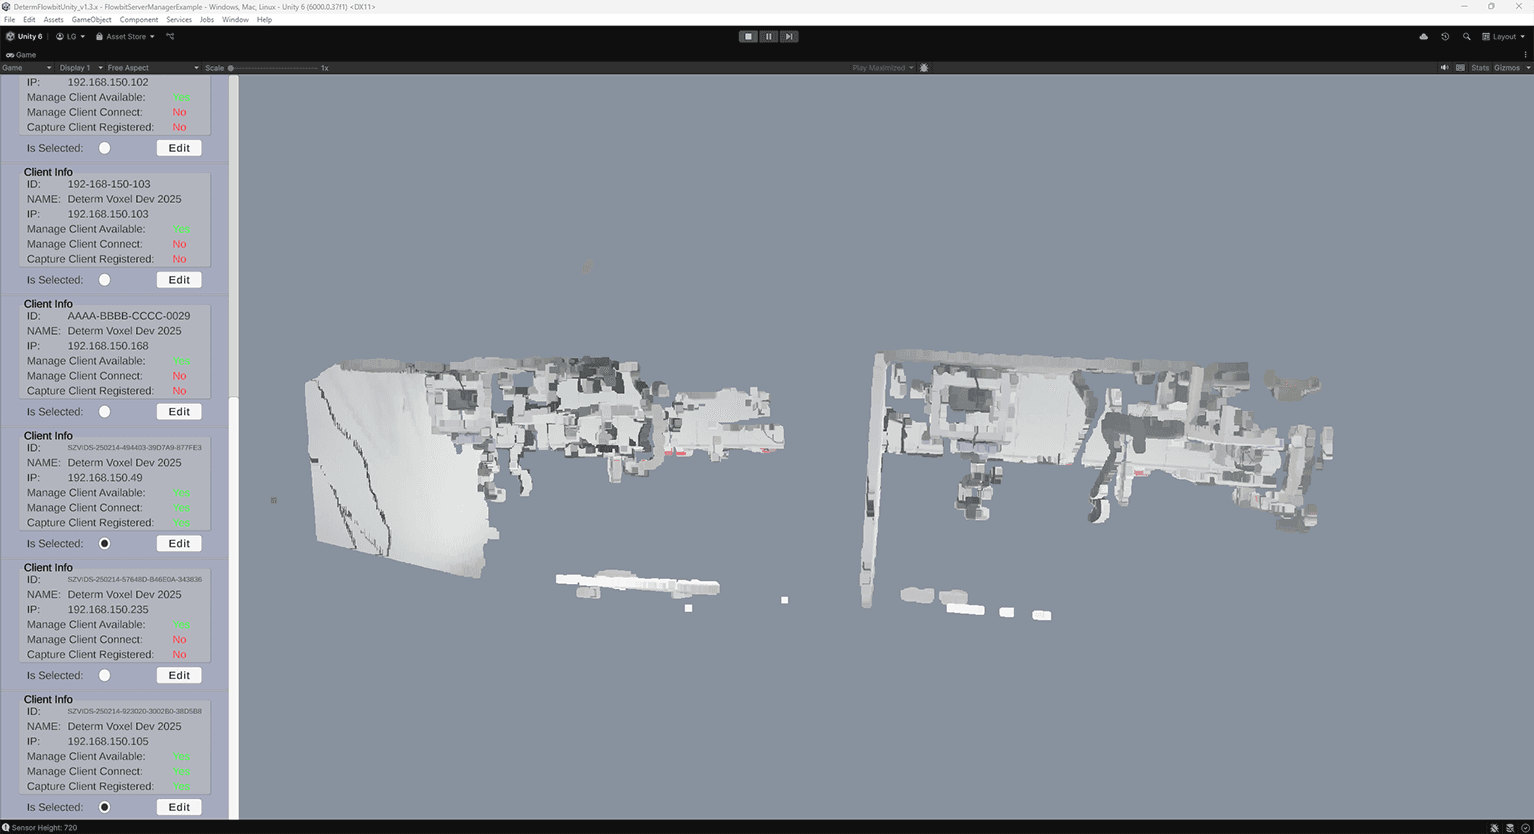
When the point cloud is streaming and rendering in the window, use W, A, S, D to move the viewpoint in the window, and click the right mouse button to rotate the viewpoint.
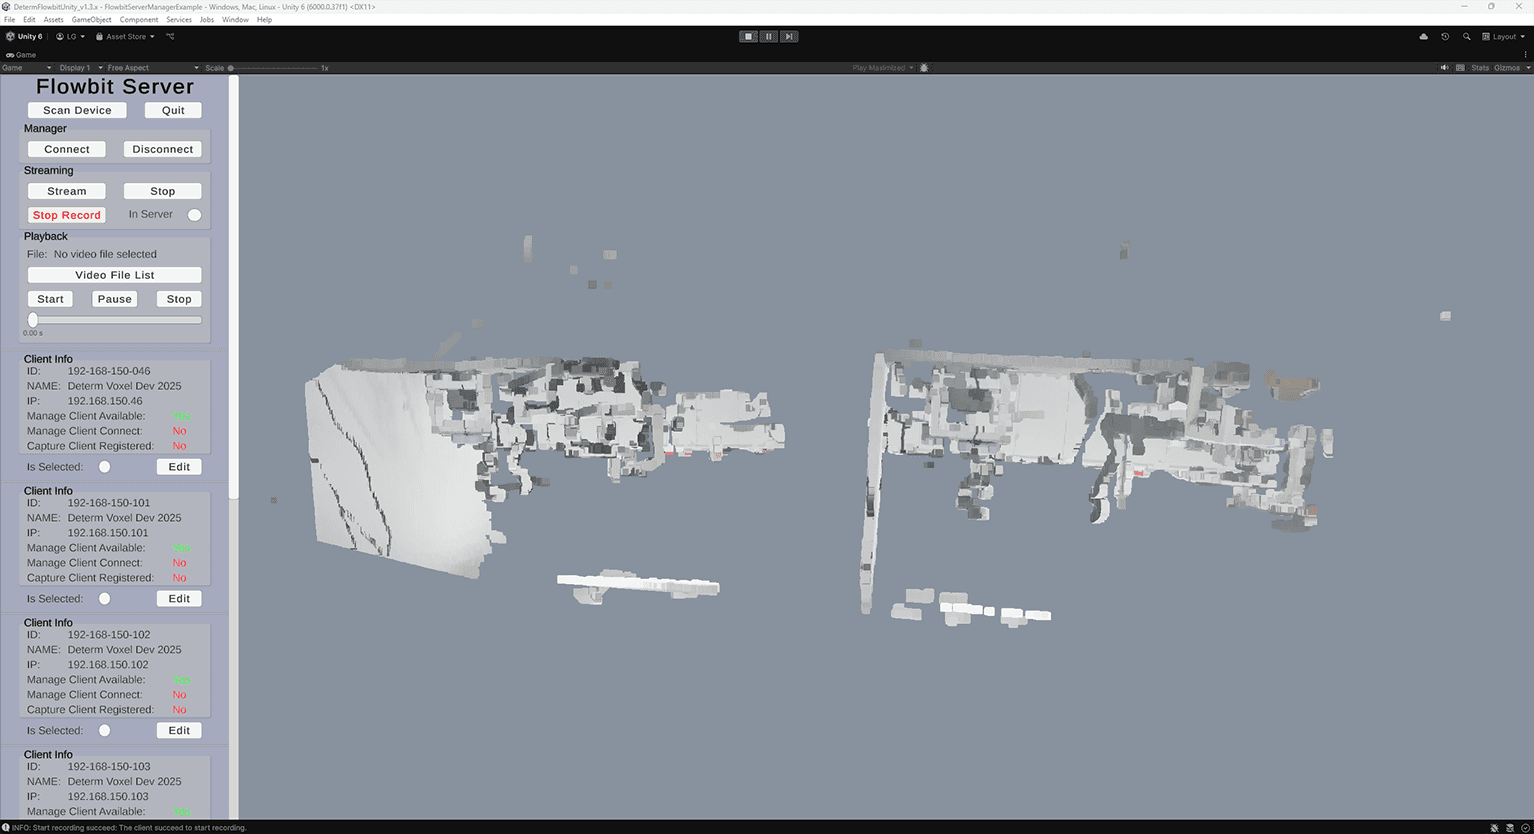
When the point cloud is streaming and rendering in the window, you can press the Start Record button to start video recording. If the In Server toggle is on, the video will be recorded on the server side; otherwise, the video is recorded on the client side. Then you can press the Stop record button (Start Record turns to Stop record after pressed) to stop video recording.
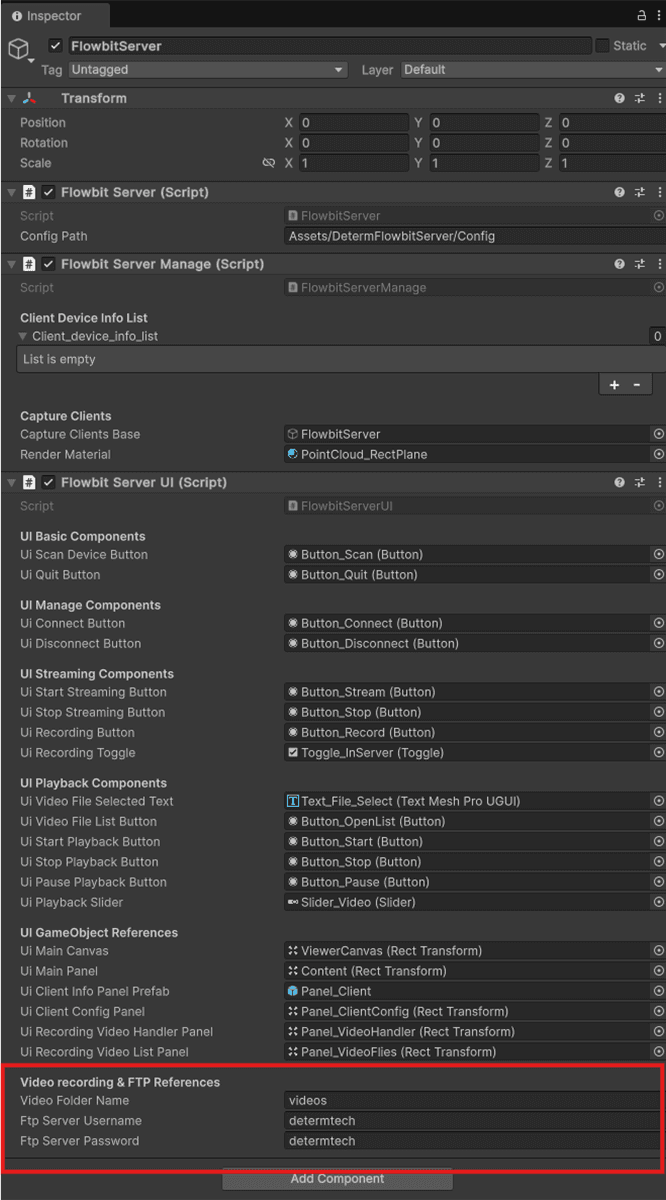
Note: If you want to save and reload videos, please remember to set the
Video recording & FTP Referencefor Flowbit Server UI script in the Inspector of Gameobject of FlowbitServer. As you can see, we set the video folder name asvideos. If the video is recorded on the client device, you need FTP functions to download the videos from the clients to the server. The default FTP serverusername/passwordisdetermtech/determtech.
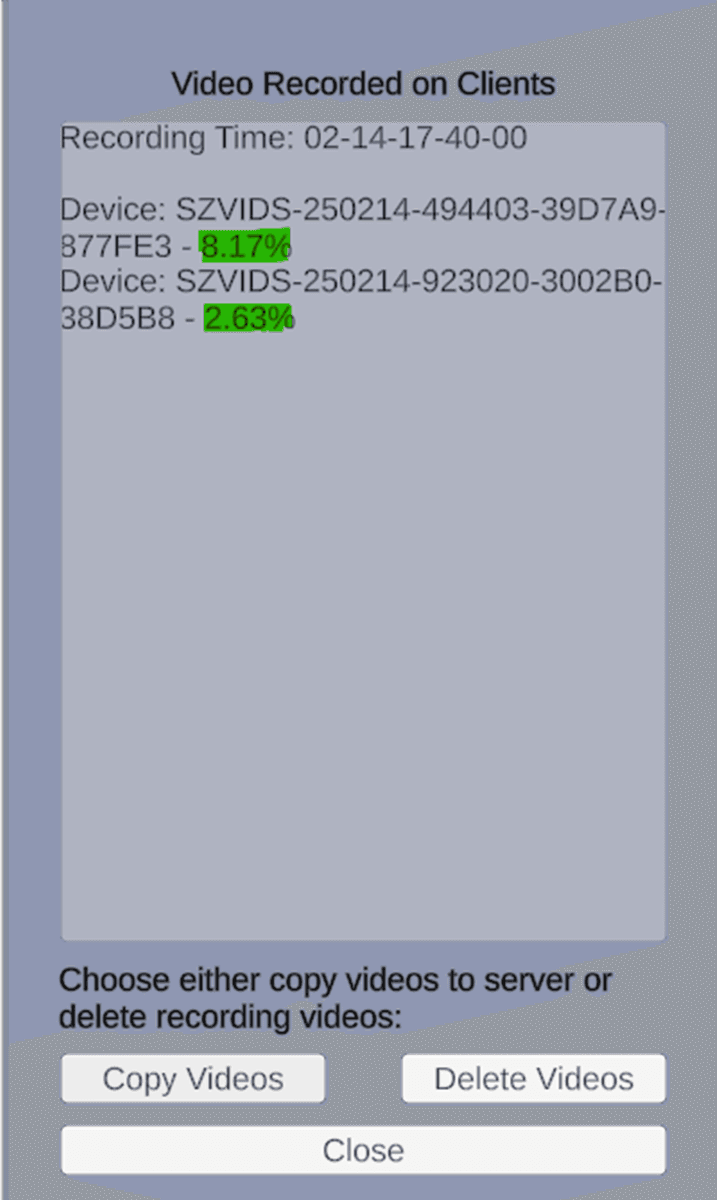
If the recording is happening on the Server side, when you press Stop Record, the system will stop recording and keep streaming. If the recording is happening on the Client side, when you press the Stop Record button, the system will pop up a Video Recorded on Clients panel. You need to decide whether to copy the video files to the server or delete the videos from the client (the video streaming is stopped at this stage). If you choose to copy the videos from the client to the server, press the Copy Videos button and the panel will show the downloading process for each video. Once all the downloads reach 100%, you can press the Delete Videos button to delete the videos from the clients to save storage space on the client devices (copies are now on the server). Then you can close the window.
You can press the Video File List button to view the recorded videos. As you can see, it will list the videos recorded with their recording time. Select the one you want to playback. The “Playback” panel will show the video files you have selected.
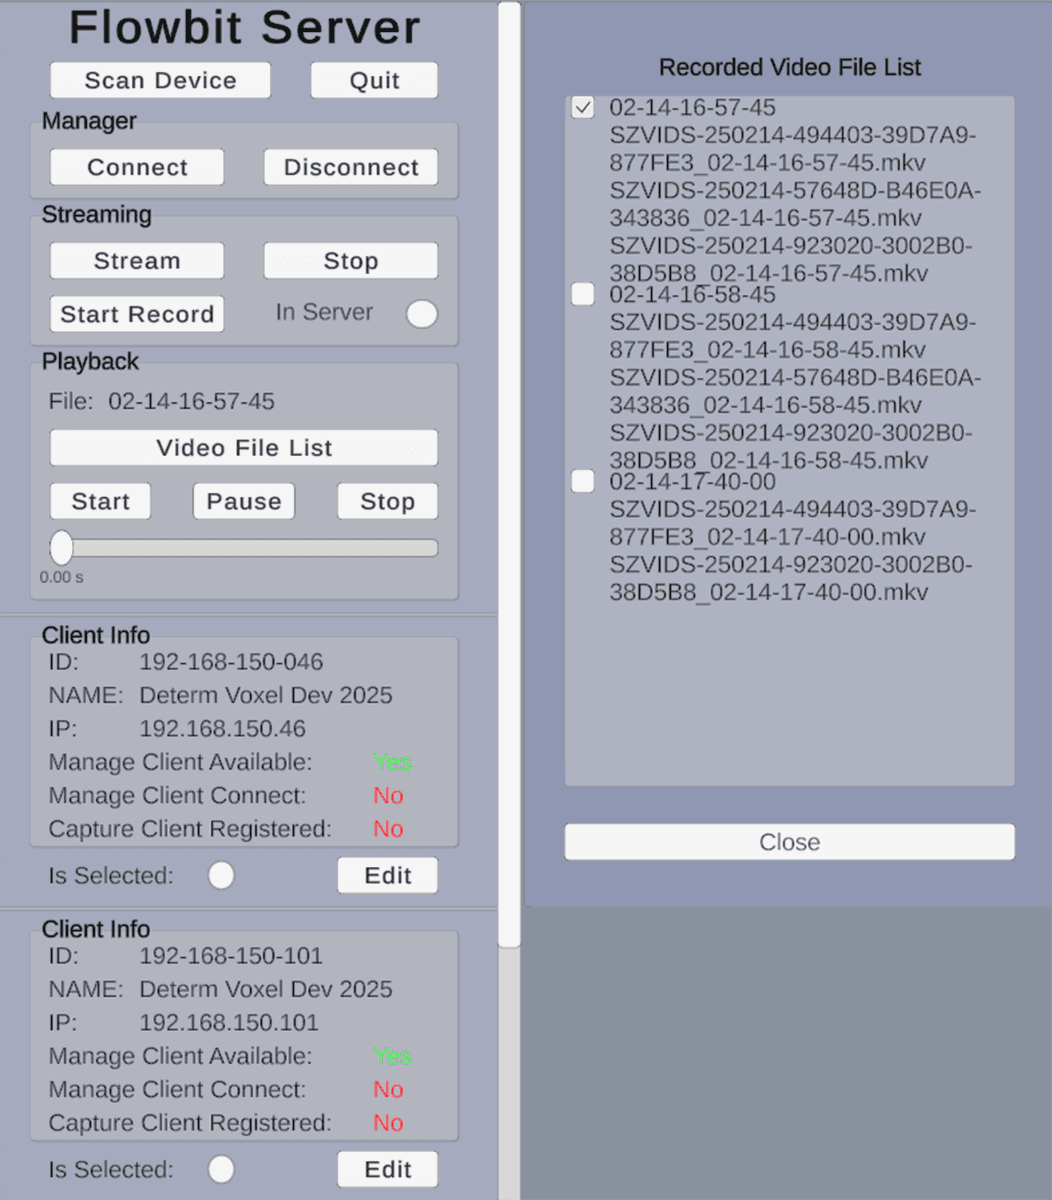
Then you can use the Start, Pause and Stop buttons to start, pause, resume, or stop the video playback. The slider will show the playback progress.
Since there may be more than one client device in the local network, each device detected (after pressing the Scan Device button) will be listed as a Client Info panel. If the Is Selected toggle is on for the Client, the above actions will affect this client, including connection, streaming, and recording.
If you press the Edit button on the Client info panel, you can modify the exposure, detection range, and transform matrix (used for aligning the point clouds from different devices in the space).

Before you press the “PLAY” button to stop the scene, if there are devices in the state of connected and streaming, please remember to press the “Stop” and “Disconnect” buttons.