Hardware Overview
This section covers the physical side of a Flowbit deployment: what the Determ Voxel camera is, what else you need to buy, how to wire it up, and where to mount it. Work through it before you install any software.
What a deployment is made of
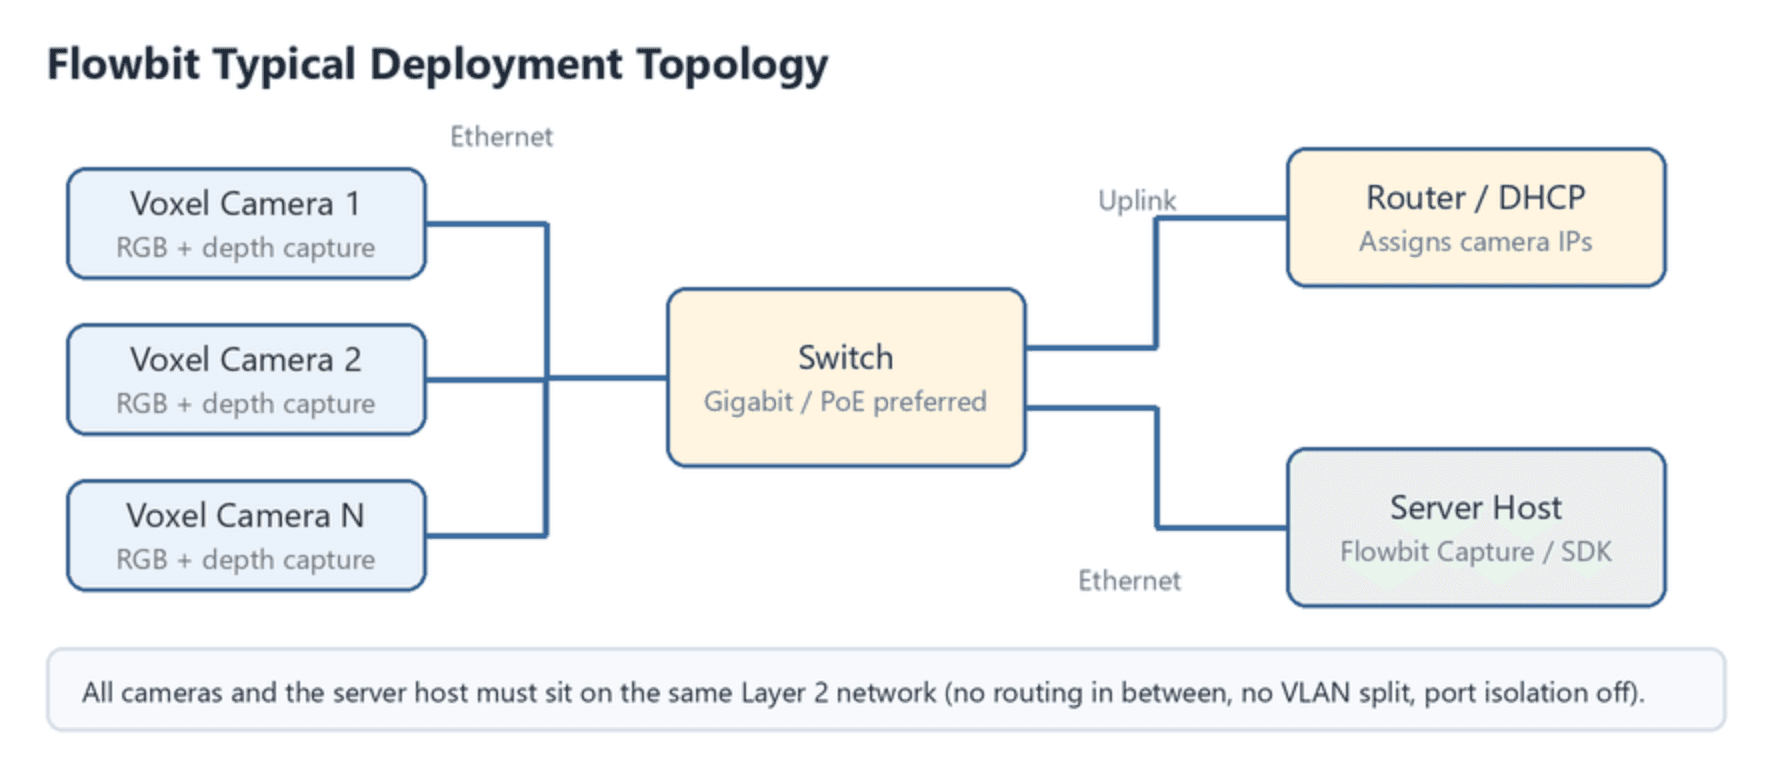
A minimal Flowbit on-site deployment has four parts:
Flowbit Voxel cameras. Each one captures RGB and depth, encodes locally, and streams over the network. Several cameras share a clock source so their frames can be synchronized.
A network switch, and usually a router. It carries the management channel, the video streams, and the clock synchronization packets between the cameras and the server.
A server PC. It runs Flowbit Server, AI recognition and segmentation, the sample viewer, or your own application.
The software. Flowbit Capture connects and configures the devices, Flowbit Calibration calibrates them, and the Flowbit Server SDK and Unity plugin are what you build against.
NOTE
For detailed wiring instructions (standalone power supply and PoE options), refer to Section 1 of "Install Your Devices: Step by Step".
In this section
Flowbit Voxel. What the camera is: compute, vision sensors, ports and LEDs, expansion connectors, platform support, and the mount thread.
Hardware Requirements. What to buy and what the server needs: the hardware checklist, the server specification, and the checks to run before installation day.
Install Your Devices: Step by Step. Wire the cameras and test them before mounting, then mount, calibrate, verify end to end, and hand over. Includes troubleshooting and the on-site delivery checklist.
(Optional) Update Your Voxel DevKit Software to v1.5. If you’re an early Voxel DevKit user and want to use the new features in v1.5, please refer to this page to update your device software.